Home-Baked Hygge

sharon_kitchen

My half-Norwegian mother is smiling at the swirl of interest in “hygge” (pronounced hoo-guh).  She was a master at home made simple pleasures that are the roots to kinship and comfort.  We could all use a few hygge tools in our kit right now.  I think my mom would endorse these five hygge hints to ease the holiday hectic:

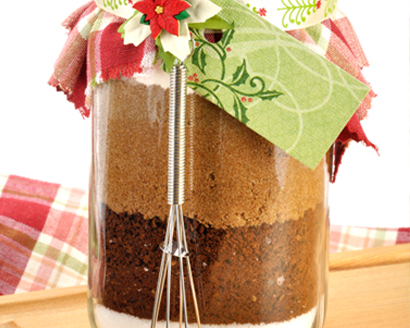
 #5:  Prep a hot beverage mix, then use it. Choose something with warm milk, less caffeine, chocolate and herbs for a little calm. I love hot cocoa mix:  Whirl in your food processor until powdery:  ½ cup granulated sugar, 1 tablespoon cornstarch, 3 oz. roughly chopped semi-or bittersweet chocolate, ½ cup baking cocoa (Dutched cocoa is a deeper flavor), ¼ teaspoon vanilla or almond extract, and a pinch of salt.   Store in an airtight jar and use 3 tablespoons mix per medium mug of heated milk or water.  Thank you @smittenkitchen!

Love your coffee too? Unwind with friends with a decaf version of C&H Sugar’s Toffee Coffee.

recipe_ToffeeCoffeeMixInJar_410x328

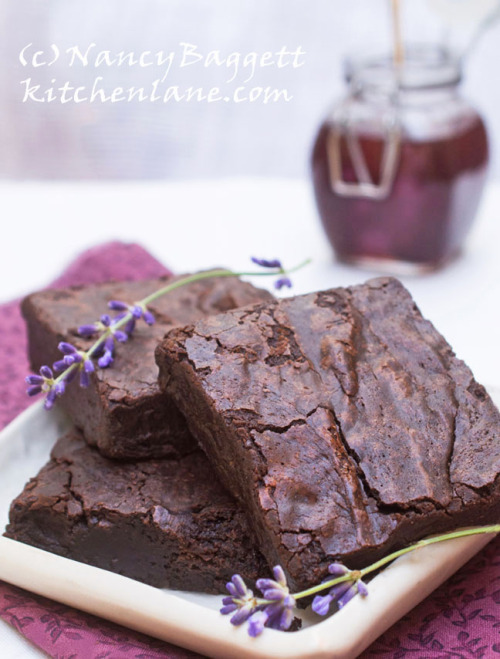
#4: Employ lavender’s magic. After holding your breath all day working the lists, breathe in one of HBA’s Writer’s Guild pro Nancy Baggett’s Lavender Place recipes Culinary lavender’s comforts range from sweet honey-spice snickerdoodles, to savory herbed popcorn for starters.

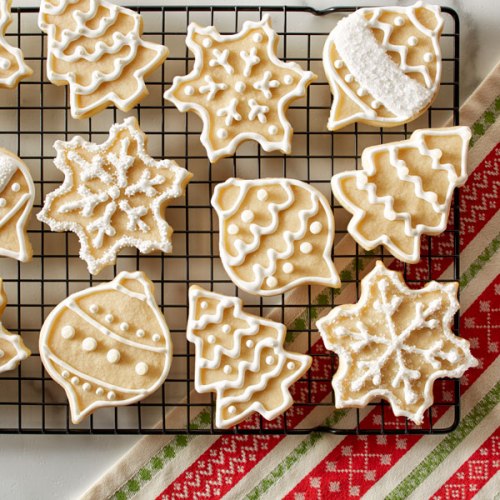
#3: Break down prep time…try making dough and freezing ready-to-bake. Just thinking, you might have time to get the dough made…but no time to bake! HBA member test kitchens lead the way on how to freeze cookie, yeast and scone dough to pop in the oven at any time.  Try this Freeze and Bake Scones example

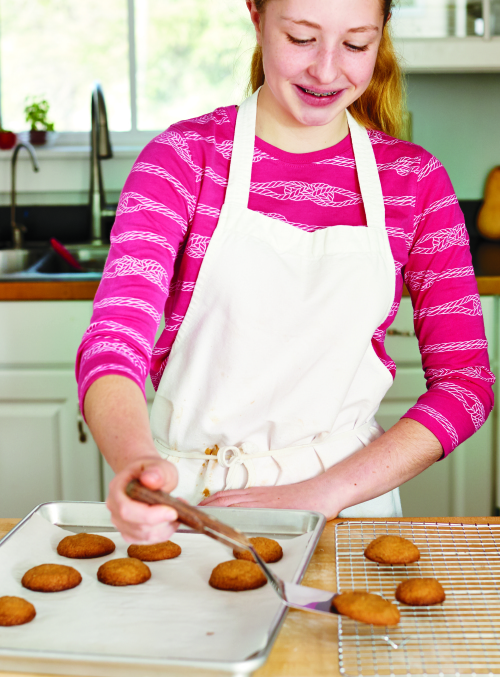
 #2:  Drop, don’t roll.  For some of us, rolling out dough of ANY kind is challenging. Go with a drop or “scoopable” version —there are many sweet and savory options!  Butternut Softies are a great holiday fruit and nut drop cookie and Drop Biscuits are naturally comfort food.

Batterway-Whole-Wheat-Bread-compressed

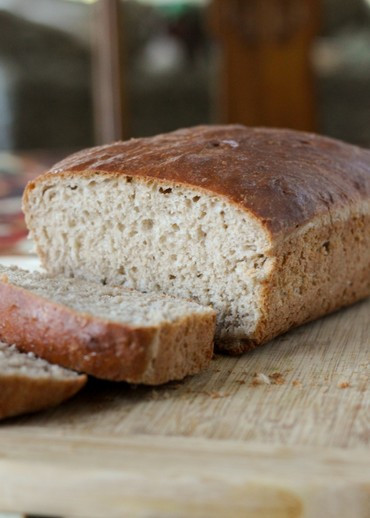
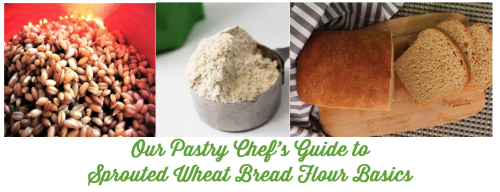
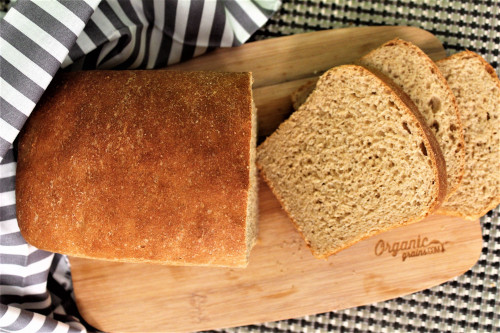
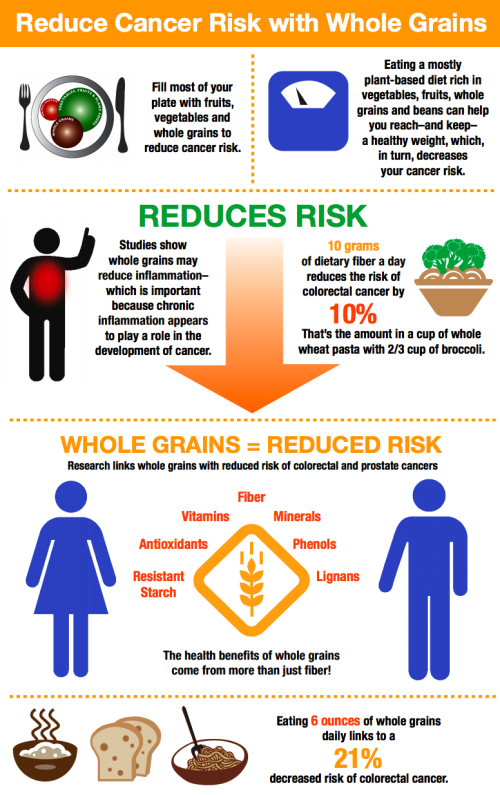
 #1:  Often, eat simply.  Try a whole grain batter yeast bread served with a favorite veggie, lentil or bean soup and soak in the comfort of home.

Even these Top Five cannot guarantee coziness, simple pleasures and kinship when you focus on them alone. Include someone in one of these gifts, and hygge will come quickly to your heart and hearth!

Posted in Uncategorized | Tagged | Leave a comment

Easy Cut-Out Sugar Cookies

2016_EasyCutSugarCookies_Holiday_20097_Desktop600x600

Rolled sugar cookies ready for decorating. With a new method for mixing there’s no need to soften the butter or chill the dough before cutting out cookies!

This great recipe was provided by Land O’Lakes. Go to http://www.Landolakes.com for more holiday recipes.

Ingredients

  • 3 cups all-purpose flour
  • 1 teaspoon baking powder
  • 1/4 teaspoon salt
  • 1 cup sugar
  • 1 cup cold butter cut into chunks
  • 1 large egg
  • 1/2 teaspoons vanilla extract
  • 1/2 teaspoon almond extract

How to make

  1. STEP 1Heat oven to 350°F. Line cookie sheets with parchment paper; set aside.
  2. STEP 2Combine flour, baking powder, and salt in small bowl; set aside.
  3. STEP 3Place sugar and cold butter into bowl of heavy-duty stand mixer fitted with paddle attachment. Beat at medium speed until well combined. Add egg, vanilla, and almond extract; beat until well mixed. Gradually add flour mixture, beating at low speed until just combined.
  4. STEP 4While removing dough from bowl, knead to incorporate crumbs and form a smooth dough. Roll out dough on lightly floured surface to 1/8-inch thickness.
  5. STEP 5Cut into shapes with 2 1/2-inch cookie cutter. Place onto prepared cookie sheets. Bake 8-10 minutes or until just beginning to brown around edges. Cool on cookie sheet 2 minutes; remove to cooling rack. Cool completely.

Tip #1

If planning to cut with intricate cutters, chill dough 30 minutes before rolling and cutting. This ensures your cookies will hold their detailed shape.

Posted in Uncategorized | Tagged | Leave a comment

Super Fudgy Raspberry-Lavender Brownies

Image raspberrylavenderbrownies

Brownies are one of America’s best baking inventions. They first turned up, without any fanfare, in the 1906 edition of Fannie Farmer’s The Boston Cooking-School Cook Book.  No, Mrs. Farmer’s brownies did not contain lavender.  But they were rich, dark, and full of chocolate flavor, so she got us off to a very good start!

These are in Mrs. Farmer’s classic brownie style (no chocolate chips, no cheesecake swirls, no icing), but with a surprising and enticing taste twist provided by raspberry jam and lavender. They are fruity and nearly as rich and deeply chocolaty as fudge—also a very good thing!

  • Tip: The baking time depends greatly on the pan used, so check frequently for signs of doneness. In a heavy, dull metal pan that absorbs and holds heat readily, the brownies may be done in only about 20 minutes. But a glass or shiny metal pan they may take up to 8 minutes longer. Use the toothpick test to tell.

Ingredients

  • 1/4 cup raspberry jam or preserves combined with 3 tablespoons water
  • 1 cup (2 sticks) unsalted butter, cut into chunks
  • 1 to 1 1/2 tablespoons dried culinary lavender buds
  • 1 2/3 cups all-purpose white flour
  • 1/4 cup unsweetened cocoa powder
  • 1/2 teaspoon salt
  • 2 cups granulated sugar
  • 11 ounces bittersweet (not unsweetened) or semisweet chocolate, broken up or coarsely chopped
  • 1 teaspoon vanilla extract
  • 1/4 teaspoon raspberry extract or homemade lavender extract, optional
  • 4 large eggs, at room temperature
  1. Heat the jam-water mixture and butter almost to boiling in a small saucepan, then set aside. Stir in the lavender buds and let stand while readying the other ingredients.
  2. Preheat the oven to 350 degrees F. Line a 9- by 13-inch baking pan with heavy aluminum foil; let it overhang the narrow ends. Grease or coat the foil with nonstick spray or cooking oil.
  3. In a medium bowl, thoroughly stir together the flour, cocoa powder and salt; set aside.
  4. Strain the butter mixture through a fine mesh sieve into a large saucepan; press down to force through as much of the mixture as possible.
  5. Stir the sugar into the saucepan. Heat, stirring, just until the sugar dissolves and the mixture is hot but not boiling; don’t worry if it looks curdled or oily.
  6. Remove it from the heat.
  7. Add the chocolate, stirring until completely melted.
  8. Set aside until cooled to just slightly warm (if the mixture is hot, the eggs may curdle when added).
  9. Stir the vanilla and raspberry or lavender extract (if using) into the pan.
  10. Vigorously stir in the eggs one at a time.
  11. Stir in the dry ingredients just until the batter is evenly blended.
  12. Turn out the batter into the baking pan, spreading to the edges.
  13. Bake (middle rack) for 20 minutes, then begin frequently testing for doneness: When the center top is barely firm when tapped and a toothpick inserted in the center comes out clean except for the bottom 1/8-inch (which will look wet), the brownies are done.
  14. Transfer the pan to a wire rack.
  15. Let stand until cooled to warm, about 20 minutes, then, for easiest cutting, refrigerate until chilled.
  16. Using the overhanging foil as handles, carefully transfer the brownie slab to a cutting board.
  17. If desired, trim away the uneven edges using a large, sharp knife. Cutting through the foil, cut the slab in half crosswise. Carefully peel off and discard the foil from the bottoms.
  18. Cut each brownie slab into 2 1/8 by 2 1/4-inch bars, or as desired; remember they are very rich. Wipe the knife clean with damp paper towels between cuts.
  19. Stored airtight, the brownies will keep well for 2 or 3 days. They also freeze well for up to a month. If freezing, leave the brownie slab whole, then cut into portions when partially thawed.

Makes 32  2 1/8- by 2 1/4-inch bars.

Art_Cooking_Lavender_coverfrontlores-1

Posted in Uncategorized | Tagged | Leave a comment

Crispy Gingersnaps

95_cCarlTremblay_Gingersnaps_BakingClassThis recipe makes about 3 dozen cookies
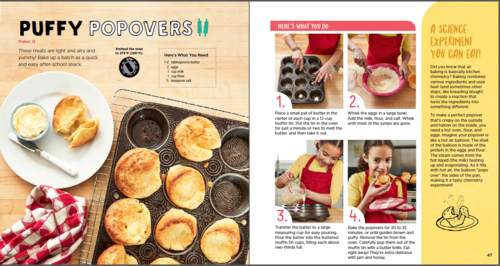
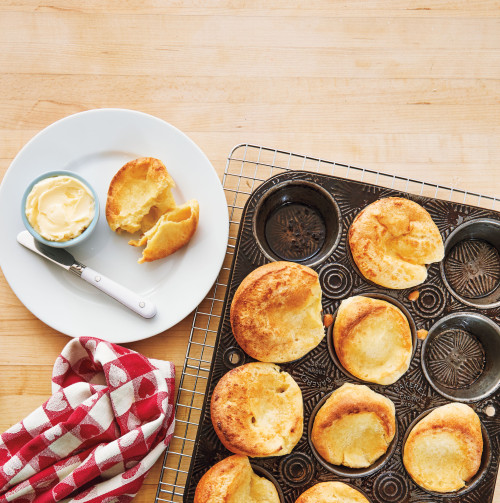
This cookie recipe is from Sarah and Saenger, two friends who love to bake together and sell their cookies for a cause (read about them at left). These gingersnaps are easy to make — and they stay fresh for a long time, even when shipped to customers through the mail!

Preheat the oven to 350˚F (180˚C)

Here’s what You Need

Cookie dough

  • 2 cups flour
  • 2 teaspoons baking soda
  • ½  teaspoon salt
  • 1 tablespoon ground ginger
  • 1 teaspoon cinnamon
  • ½ teaspoon ground cloves
  • ¾ cup (1½ sticks) butter, softened
  • 1 cup sugar
  • 1  egg
  • ¼ cup molasses
  • teaspoon finely grated fresh ginger

Topping

  • ½ cup sugar
  • 2 teaspoons ground ginger

Here’s What You Do

  • Stir together the flour, baking soda, salt, ground ginger, cinnamon, and cloves in a medium bowl.
  • In a large bowl, cream the butter and sugar with an electric mixer. Beat in the egg, molasses, and fresh ginger.
  • Add the flour mixture in two parts, blending at low speed until thoroughly combined.
  • Line two cookie sheets with parchment paper or grease them. Roll the dough into balls about 2 inches in diameter.
  • To make the topping, mix the sugar and ground ginger in a shallow bowl. Roll the balls in the topping and place on the cookie sheets, about 2 inches apart.
  • Bake for 15 to 20 minutes. Let the cookies sit for 5 minutes on the pan, and then transfer them to a rack to cool completely.

“Excerpted from Baking Class © by Deanna F. Cook, photography © by Carl Tremblay, used with permission from Storey Publishing.”

Posted in Uncategorized | Tagged | Leave a comment

Join the “Dine-In” Dec. 3 for Family Health and Wealth

sharon_kitchen

Whether it’s a simple one-dish meal, casseroles, creative variations or three courses and dessert, carry forward the “dine-in” benefits with over 300,000 others on December 3rd!
StewInfographic-1024x959
Whatever time of day or night you need to make that shared meal happen, nothing benefits relationships, school success, and even your family’s hard-earned savings like eating together at home as a family.
Leading this drive to thrive is the American Association of Family and Consumer Sciences along with their professionals and partners. Share what you’ll do, join the list of committed dine-at-home diners or find great resources here.
FCS_WebBanner_1200.png
Posted in Uncategorized | Tagged | Leave a comment

Give the Gift of How-to-Bake 

sharon_kitchen

After 35 years of baking everywhere and anyway I can with anyone 2 to 92 who’d join me, I love to find new ideas, recipes and resources to get the flour in the bowl and the heart and mind engaged.  It takes more than a cool app or web-site to get a baking buzz going in today’s kitchens.  There are at least three challenges to overcome:

  • Skill comfort to bake alone OR an available baking assistant
  • Available ingredients and tools
  • Time (inversely related to skill—the more baking skill, the less time you’ll need)

HomeBaking.org is ALWAYS a great place to start, so let me introduce our newest Writer’s Guild member, Deanna F. Cook. Deanna is a kids-cooking best-selling author, content director at Kidstir, as well as an acquisitions editor at Storey Publishing. She lives in western Massachusetts and is found online at deannafcook.com.

Her newest book, Baking Class, 2017, Storey Publishing, ISBN 978-1-61212-855-9, is perfect for building baking skills, baking for the family, and giving to someone you love.

Baking+Classcoverphoto

You can’t replace baking together as a gift that nourishes the whole person for a lifetime.  Contributing something you’ve baked for a meal or event builds self-sufficiency and true self-esteem. Deanna’s “baking companion” works great for kids ages 6–12 and features 50 easy-to-follow recipes.

BakingClassTable+of+Contents

Deanna shares, “I invited more than 20 children over to my kitchen and we baked together and photographed the steps along the way. All the recipes are easy to follow, fun to look at, and can be made by kids with just a little help from a grown-up. “

Step-by-step photos teach bakers-in-training how to knead dough, make biscuits, popovers, decorate cookies, and make a perfect pie, along with essential skills like measuring flour and decorating a cake—perfect for meals or made-by-me-for-you gift giving!

You’ll start a new holiday meal “must-have” with Puffy Popovers, Just 5 ingredients—2 tablespoons butter, 2 eggs, 1cup milk, 1 cup all-purpose flour, and ½ teaspoon salt, a muffin cup pan and an oven! Popovers are “a science experiment you can eat” and MUST be locally made—yet another plus.

Teachers, get the total buy-in of students and parents by hosting an early childhood baking workshop using the Baking Class resources.

When you wrap a book to give, why not include a “time certificate,” for a date and place to bake some recipes side-by-side in 2018? It’s the gift that keeps on giving.

Posted in Uncategorized | Tagged | Leave a comment

Puffy Popovers

46_CarlTremblay_PuffyPopovers_BakingClass.jpgMakes 12

These treats are light and airy and yummy! Bake up a batch as a quick and easy after-school snack.

Preheat the oven to 375⁰ F (190⁰ C).

Here’s What You Need

  • 1-2 tablespoons butter
  • 2 eggs
  • 1 cup milk
  • 1 cup flour
  • ½ teaspoon salt

Here’s What You Do

  1. Place a small pat of butter in the center of each cup in a 12-cup muffin pan. Put the pan in the oven for just a minute or two to melt the butter, and then take it out.
  2. Whisk the eggs in a large bowl. Add the milk, flour, and salt. Whisk until most of the lumps are gone.
  3. Transfer the batter to a large measuring cup for easy pouring. Pour the batter into the buttered muffin pan cups, filling each about two-thirds full.
  4. Bake the popovers for 30 to 35 minutes, or until golden brown and puffy. Remove the pan from the oven. Carefully pop them out of the muffin pan with a butter knife. Eat right away! They’re extra delicious with jam and honey.

47_CarlTremblay_PopoversHowTo4_BakingClass.jpg

A Science Experiment You Can Eat!

Did you know that all baking is basically kitchen chemistry? Baking combines various ingredients and uses heat (and sometimes other steps, like kneading dough) to create a reaction that turns the ingredients into something different.

To make a perfect popover that’s crispy on the outside and hollow on the inside, you need a hot oven, flour, and eggs. Imagine your popover is like a hot air balloon: The shell of the balloon is made of the protein in the eggs and flour. The steam comes from the hot liquid (the milk) heating up and evaporating. As it fills with hot air, the balloon “pops over” the sides of the pan, making it a tasty chemistry experiment!

Excerpted from Baking Class © by Deanna F. Cook. Used with permission from Storey Publishing.

Posted in Uncategorized | Tagged | Leave a comment

Pastry Chef’s Guide to Sprouted Wheat Bread Flour Basics

stephaniepeterson

You may have noticed bread labels sprouting “sprouted wheat flour” as an ingredient. It’s even now available for home bakers! This fall’s baking season is a great time to explore the world of sprouted wheat flour baking, but you won’t have to repeat my mistakes!  Start your adventure with HBA member Panhandle Milling Company‘s Pastry Chef Stephanie Petersen’s guide and recipe!


Natural sprouted grain flours are among some of the most nutrient-dense foods you can add to your diet. If you’re like a lot of people who have tried to bake with sprouted wheat and found a few challenges, you’re not alone. In this article, we’re give you some great tips for using these flours in your bread baking that will give you great results.  Our seasoned pastry chef struggled with this flour through several experiments in our test kitchen before she finally found some tips to increase your success. Hopefully these will help you on your journey!

  • Knead more or add gluten. Sprouted hard wheat flour is slightly lower in viable gluten-content for easy dough structure. Increase the kneading time in your standard recipes by a few minutes, or add a 1-2 teaspoons vital wheat gluten per cup (depending on the baked product).
  • No long fermentation needed. Classically trained bread bakers know that long slow fermentation gives dough the deepest flavor and character. During this fermentation, the enzymes in the wheat go through some changes like the sprouting process. The depth of flavor can be achieved in a very short amount of time with sprouted flours. Longer fermentation will cause sprouted flour to not raise as much as it would with a short raise.
  • Cup for cup.You can use sprouted flour the same as you would use un-sprouted flour, cup for cup.
  • Sprouted spelt is different. Though it is a wheat variety, it contains less gluten than all other wheat varieties. Spelt does not rise as high as other wheat varieties due to the low gluten content.
  • Avoid rancidity.Sprouted flours should be stored in a cool, dark, dry place in an airtight container and is best consumed within 12 months. The freshness can be extended by at least 6 months in the refrigerator and another 6 months in the freezer.
  • Be safe. Treat all flour like it is a raw product. Store raw flour away from ready-to-eat foods. Keep the measuring of unbaked dough away from areas where baked products are stored. Clean work surfaces with hot soapy water before and after baking with raw flour and doughs. Wash hands after handling raw dough and before tasting any baked goods. Bake all bread to a safe internal temperature (190°-210° F). 

IMG_1018
No-Fail Sprouted Wheat Bread

This recipe is one that our chef perfected after many loaves. We think you’ll agree, it is great for bread! There are many more ways to use this versatile dough. It’s a quick recipe. The bread is ready to bake in about an hour! Yield: 2 loaves.

Filtered water| 2 cups
Olive Oil| 1/4 cup
Honey| 2 Tbsp.
Sea Salt| 2 tsp
Sprouted Whole White Wheat Flour |6-7 cups

Vital Wheat gluten powder*|1/4 cup
Active Dry Yeast| 1 Tbsp.

Directions: 

  1. Wash and sanitize all work surfaces and tools.
  2. In a large bowl, combine the flour, sea salt and vital wheat gluten*.
  3. Measure liquid ingredients into a second large bowl. Add the yeast using only half the flour and adding yeast last.
  4. Mix gently until the flour is moistened. Continue mixing, adding flour until the dough comes away from the sides and bottom of bowl.
  5. Knead 8–10 minutes by hand or 4-5 minutes with a mixer using the dough hook on medium speed. Form into a ball and place in a gallon-sized bowl. Cover with plastic and allow to raise about 30 minutes. Deflate dough. Divide dough into two equal portions. Shape into loaves and place in greased 8 inch by 4-inch loaf pans.
  6. Wash and sanitize hands and work surfaces again.
  7. Let rise until doubled or 1″ above pan (we suggest covering it loosely with a tented plastic grocery bag or misting with water and placing in a cool oven.) Preheat oven to 350° F. Bake for 30-35 minutes or until at least 190° internal temperature. Cool on racks. Slice after 15 minutes, store or freeze after 2-3 hours.

* Use of vital wheat gluten is optional, but our test kitchen has found this addition to give the most consistent results without having to knead excessively. If you omit this, increase your kneading time by at least 3 minutes by hand, if not longer.

by Stephanie Petersen

Posted in Uncategorized | Tagged | Leave a comment

Savory Galette: A to Z

sharon_kitchen
Who can resist seeing your own child bake and serve something amazing?  Whether they’re 5 and serving you their first muffin or twenty-five you’re savoring the moments. Granted, at five, somedays it’s hard to choose–“should I let them help and pay the “time and clean-up price” or do-it-myself?” Let me show you the pay-off.

Last weekend our 24-year old daughter served up an amazing Potato Leek Galette with Rosemary Sea Salt Crust for a shared Sunday supper.

We grew the Yukon Gold potatoes and onions in our Community Garden—she bought the leeks at the Farmer’s market and harvested her own fresh rosemary.

PotatoLeekRosemaryGalette

Katy’s recipe came from Cara Mangini, October/November 2017 Fine Cooking magazine.

From a teacher’s perspective, I love teaching people how to bake a Galette. Young bakers succeed and go home and can bake them on an oven-proof dinner plate–perfect for students who may not have a lot of baking pans yet.

For the Recipe Buzz” on galettes, sweet or savory, starting with “A” for Asparagus Galette and ending with a beautiful Zucchini Galette

For a ready-to-go lesson on baking a Rustic Fruit Pie (Galette), download Book and Bake Easy-as-Pie, filled with pie lore and apples galore.  See a How-to video, www.HomeBaking.org, the Baking Channel.

Posted in Uncategorized | Tagged | Leave a comment

Share the Whole Grain Wealth

panhandle_grains.jpg

Pantries in the United States are blessed. We have so many types of whole grains and seeds to cook and bake. An excellent new resource includes the ingredient pages with images and descriptions of ancient and specialty wheats, corn, grains and seeds found at PanhandleMilling.com. Baking formulations are also being added by Chef Stephanie Petersen for a plethora of savory and sweet biscuits, tortillas and breads.

The health benefits of making at least half of the grain foods eaten every day “whole grain” are many.  The WholeGrainsCouncil.org offers teaching resources and infographics to illustrate what “whole grain” is and how to recognize whole grain foods using the foods label and with their Whole Grain Stamp.  The many benefits of eating cooked whole grains and baking with whole grain flours, rolled grains or meal are illustrated using their infographic.

wholegrains-cancerrisk

Another helpful guide to define what grains are “ancient,” and what are “pseudo” is Ancient Wheat and Pseudo Grain prepared by the Wheat Foods Council.

 Cooking and baking with whole grains, the flour and meal produced from them can be fun as well as challenging. In baking, if too much non-wheat grain is substituted, results may be disappointing.  Access Baking with Whole Wheat Flour 101,  and make a note:  Almost any recipe that is already great could be baked with a mixture of non-wheat whole grain flours or meal if it is no more the ¼ or 25% of the flour in the recipe.

  • Example: A pancake recipe calls for 2 cups all-purpose or whole wheat flour—you can use 1 ½ cups all-purpose or whole wheat flour plus ½ cup of a multi-grain mixture like cornmeal, flax meal, oatmeal, sorghum, spelt or other flours

The Home Baking Association members include many historic, regional mills. Stone-Buhr Flour buys regionally and mills soft Pacific Northwest Wheat, ideal for flat breads, crackers, Asian noodles and pastries. Bake your own whole grain cracker to celebrate whole grain month.

Bake your grand finale to September by choosing another historic flour to bake whole wheat biscuit whole grain, biscuit and breakfast celebrations.

Posted in Uncategorized | Tagged | Leave a comment